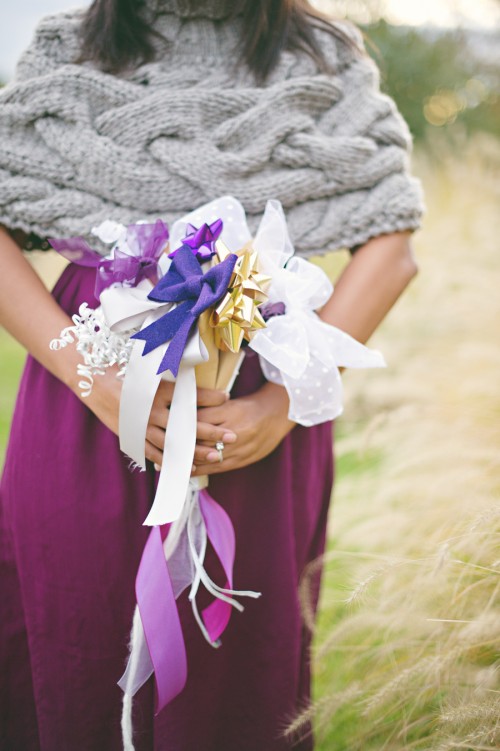

What do you think of when you see a paper plate? If you’ve attended enough wedding showers, it’s possible that a bow-covered monstrosity pops in your head. We’re not knocking a longstanding tradition, but we thought maybe there was room for an update to this classic bridal shower activity.
Before we offer the DIY details, we should share the ground rules we set for ourselves. First, no crazy supplies. Considering it’s often difficult enough track down a paper plate once the present opening begins, we didn’t want to add chicken wire, knitting needles, and a hot glue gun to the mix. Second, the updated bouquet couldn’t be more time consuming to make than the traditional paper plate version. Wedding related activities tend to take approximately 3.4 times longer than regular activities (it’s a scientifically proven fact!). The last thing we want to do is relegate bridesmaids to some sort of bow tying sweatshop in service to the perfect ribbon bouquet. Finally, the bouquet couldn’t take itself too seriously. It’s a bouquet made out of ribbons for goodness sake—let’s keep it fun!
You will need:
– tape (Japanese masking tape like this makes it prettier, but isn’t necessary)
– scissors (tearing neatly also works in a pinch)
– wrapping paper (regular paper or construction paper also work)
– various ribbons and bows
Directions:
Have your tape and scissors ready when the gift opening begins. Once you have a piece of wrapping paper, cut a square with sides approximately 6- 8 inches long. (The squares don’t have to be the same size; in fact, it’s better if you get a little variety in their sizes.) Roll the square into a cone shape, making sure to leave enough space to string a ribbon through on the bottom, and secure with a piece of tape. Do the same with other pieces of wrapping paper until you have about 10-12 cones [hint:this can also be done in advance].
Begin feeding ribbons through the cones, so each one has a ribbon hanging from the bottom [hint: since you have multiple cones instead of just one plate, each person can even be responsible for making one out of their own wrapping]. If the ribbon isn’t long enough to make it through the top of the cone, tie a knot in it, so it doesn’t slip through the bottom. Add bows to the top of the cone, either by tying or taping them.
Arrange the ribbon cones as you would flowers in a bouquet. Once they are assembled, wrap tape around the “stems” from the bottom to about ¾ of the way up the cones. Now show off all your hard work to the bride to be, and with the time you saved, focus your attention on winning those shower games!
No weekly wrapup from me this week…with the move taking over my life, I haven’t even had a chance to check out my fav blogs! Enjoy the weekend and happy halloween!
[image from Trent Bailey Photography]
Trent Bailey and YOU + Me* are sponsors of Brooklyn Bride
